Tuesday 26 May 2015

Sword and Spear

So this week we had a go at Sword and Spear, which is a fairly recent set of ancients rules.

I have a decent sized Late Roman army, based for Impetus and Impetus has been a bit quiet at the club of late. I was looking for another set of rules that would allow me to use the same bases, and Sword and Spear seemed to fit the bill.
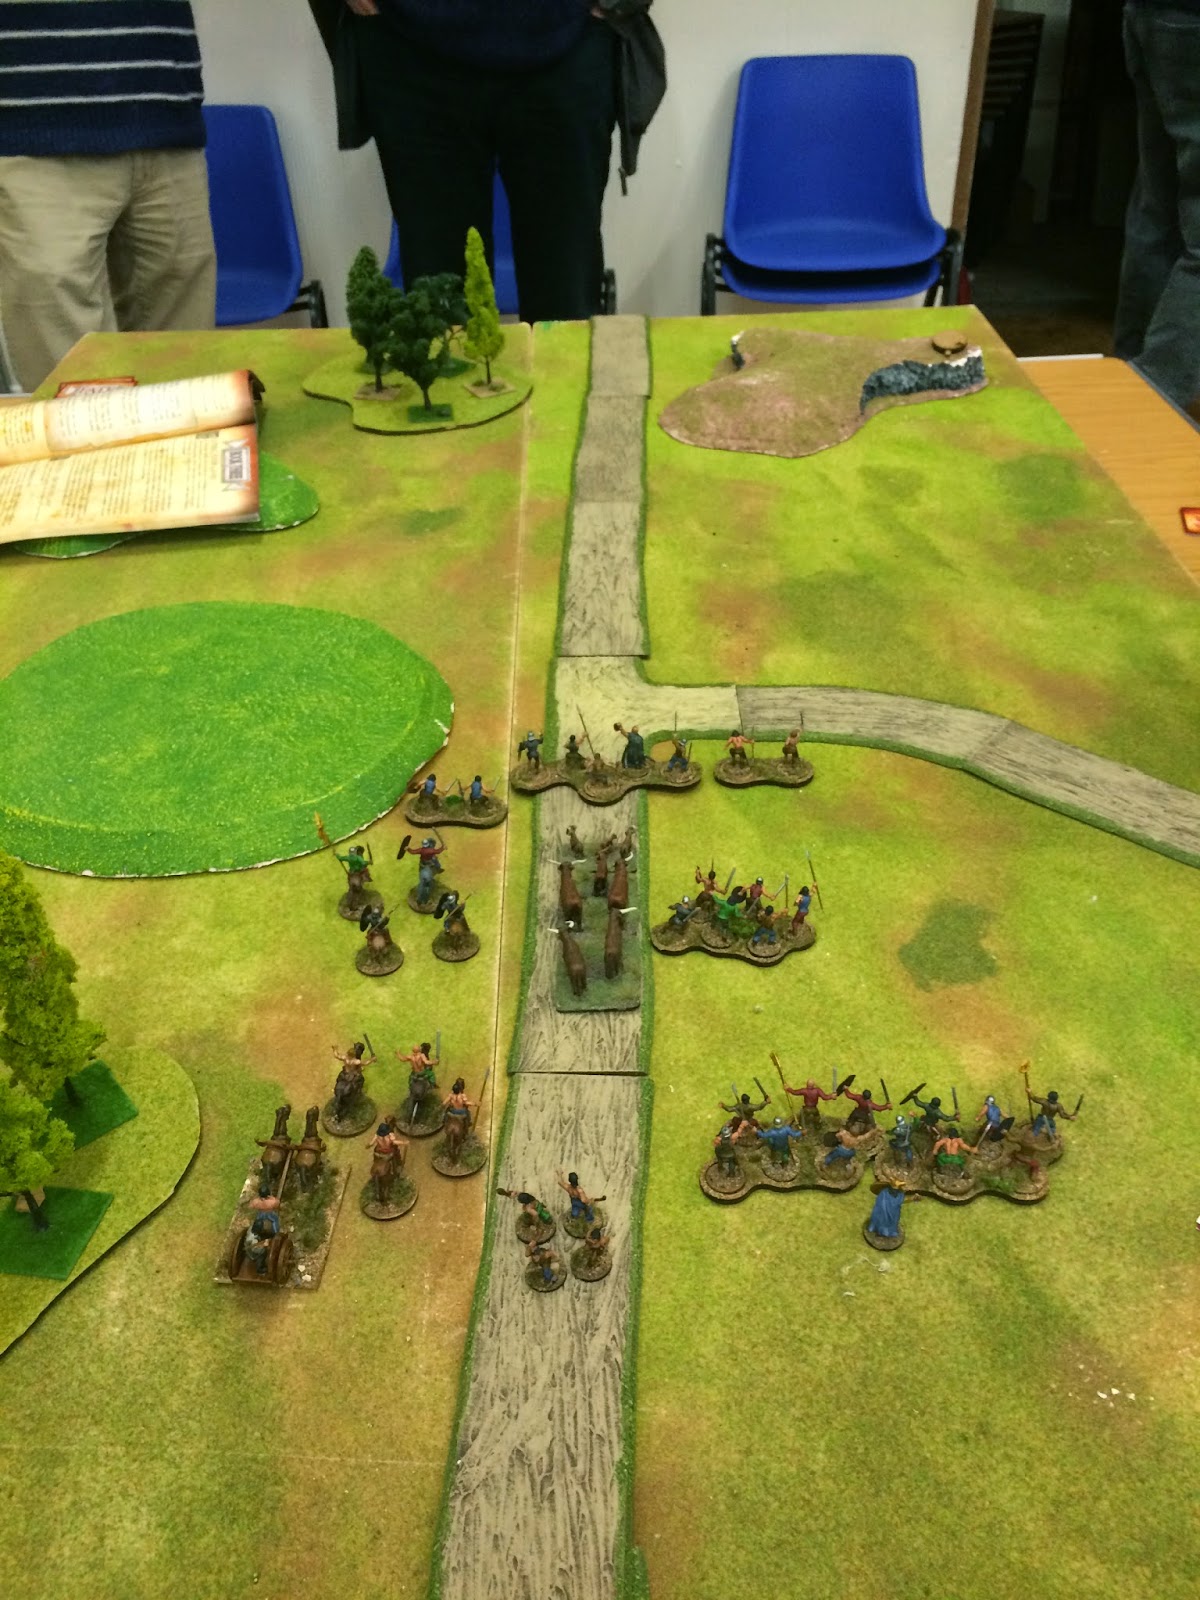
I used my troops as Sub-Roman British, while John brought his Picts, supported by some Saxon and British Allies.
I looked at what I had a cobbled together a force for my first game, totalling 10 infantry units and 4 cavalry, while John brought 3 cavalry units and about 15 infantry.  I had the better cavalry and some heavy foot, while john had lots of troops, many of which had the impact rule.
Pictish Horde

Stout Romano British

Both side line up.


The main thing that differentiates Sword and Spear from other games if the way the units are activated.  At the start of the turn you take one coloured dice for every one of your units, and one different coloured dice for every one of you opponents units and place them all in a bag.  The game turn is then broken into phases, and at the start of each phase you randomly draw 7 dice, and hand the amount of relevant coloured dice to each controlling player.  The player with the most dice becomes the active player, who then takes his dice and rolls them.   The controlling player can then take these dice and put them against units so that they can be activated, as long as the dice roll is equal to or exceeds the discipline value of the troops you wish to activate.  The other player then does the same.  After this you will be able to see which troops will be activated in the current phase. 
Once the dice are assigned you start activating your troops, starting with the lower dice roll and working your way up until everyone has been activated.  Troops complete their actions when they are activated, including concluding any combats before moving on to the next unit.
After everyone who has a dice assigned to them has been activated you draw another seven dice, and do it all again. You repeat this until all the dice are used then put them all back in the bag (minus any casualties) and do it again next turn.  Quite clever but requires a lot of thought and makes co-ordinating your troops a bit tricky.

Dave and I opted to hang back and let the Pictish hordes come to us, while trying to turn one flank with our superior cavalry.  We held our ground and let them advance, and when the moment came Dave sent the cavalry crashing into the Pictish Flank.  With 2 hard hitting units charging in we thought that we would make an impact but to sets of fluffed dice rolls later and our mighty charge had splutterd out, having virtually no impact on the game.  


 In the centre the Pictish line advanced and John got lucky with his activation and managed to attack my lines with virtually all of his troops at once.  A massive melees erupted in the centre, with no side gaining any advantage in the first round of the combat. 


 At this point both sides were committed to the combat and almost everyone’s dice were getting used ti instigate combats. The cavalry managed ot inflict some damage, but certainly not enough to be worth their cost! In the centre some rather unfortunate dice rolling saw the Romano- British line start to crack under the pressure, before we ran out of time.  We declared a winning draw for the Picts, but in reality it just a matter of time before our forces were destroyed.


So an interesting game, with some pretty awful combats from our side.  All in all I enjoyed the game and there was lots of thinking to be done about how best to manage a limited resource, which always makes for an interesting game.  I will definitely give it another go soon, as one game is never enough to get an idea of how good a game is, and I am always looking for an excuse to get my Roman army on the table.

Next week we are back to Necromunda.  I know I said I was unlikely to play any more but I decided that sa I had signed up to the campaign it was only fair that I see it through to the end.

Wednesday 20 May 2015

Housekeeping

Sorry if things are going a bit wonky.

I am trying to get all the relevant campaign posts to appear together, which I think I have managed but to do that I had to delete and then report them, which is why there appear to be a few updates tonight!  


Another 48 Hours in May

Introduction
This campaign is set in Northern France in late May 1940. Following the German breakthrough at Sedan the Panzer divisions have rushed westwards through France and striking north for the coast have trapped the British Expeditionary Force and French 1st Army.
The counter-attack at Arras has failed to break through the German lines and the Allies are retreating towards the coast.
The Allied commanders have deployed some of their troops to act as blocking positions holding the Germans back as long as possible to allow their comrades to pull back to more defensible positions.
Campaign structure
The campaign will be played using the “At the Sharp End” supplement for Chain of Command.
It will consist of 7 Campaign turns and take the form of a half ladder campaign. The Germans have the strategic initiative and are the attackers. The Allies task is to delay the Germans for as long as possible. If the Allies can hold out for 7 turns they can claim victory.
The German attackers start with a company of 3 rifle platoons based on the German 1940 list.
The Allies have 2 Platoons of French infantry and 1 platoon of BEF chosen from the 1940 lists.
German Objective – Capture the road and rail bridges over the Canal de Neuf Fosse at Arques and les Fontinettes and secure the road from Arques to Cassel.
Start line - on the road between la Garenne and la Croix.
Allied Objective - Delay the German advance for 48 hours.
Starting positions – Outposts at Arques and Ophove, HQ at la Payellette
Scenarios
1.      The Probe – locate Allied defensive positions.
2.      Delaying Action – Allies attempt to delay build up of German attack.
3.      Attack and Defend – Capture bridges over canal.
4.      Attack on an Objective/ Flank Attack – German attack on la Payellette ridge.
The first 3 scenarios will be played on a 1v1 basis, but the final scenario will involve all remaining troops as a multi-player game using the Big CoC rules.
German Players   Allan Ronald, 1st Platoon and Coy CO
                                  Kenny Thomson, 2nd Platoon
                                  Dave Knight, 3rd Platoon
Allied Players -         Barry Crawford, French 1st Platoon and French CO
                                  Chuck Aitken, French 2nd Platoon
                                  Andy Wilson, BEF Platoon and British CO.
Timing – Campaign will start in May and scenario 1 should be completed that month. Aim will be to play at least one scenario each month thereafter.
Players are asked to report on the outcome of each game and the current state of their platoon to their CO and the Adjutant (John Ewing) after each game.
Wounded men will not return to their platoon unless results are submitted on time!!

Here come the Yanks

Introduction
This campaign takes place in late August 1944 as Allied Forces have crossed the Seine and are pushing on across Northern France towards the Belgian frontier. While the German forces are in retreat they can still put up a stubborn defense as they seek to hold positions to allow their comrades to withdraw to more defensible positions further to the east.
This campaign pitches a US Rifle company, currently attached to the First Canadian Army during its drive to clear the Channel ports, against a mixed force of German infantry defending the bridges over the Canal de Neuf Fosse at Arques.
Campaign structure
The campaign will be played using the “At the Sharp End” supplement for Chain of Command.
It will consist of 7 Campaign turns and take the form of a half ladder campaign. The Americans have the strategic initiative and are the attackers. The Germans task is to delay the Americans for as long as possible. If the Germans can hold out for 7 turns they can claim victory.
The American attackers start with a company of 3 rifle platoons based on the US list in the CoC rules. The Germans have 3 Platoons of regular infantry chosen from the list in the rules. In both cases support options are limited, particularly tanks are in short supply.
American Objective – Capture the road and rail bridges over the Canal de Neuf Fosse at Arques and les Fontinettes and secure the road from Arques to Cassel.
Start line - on the road between la Garenne and la Croix.
German Objective - Delay the American advance for 48 hours.
Starting positions – Outposts at Arques and Ophove, HQ at la Payellette
Scenarios
1.      The Probe – locate and confirm German defensive positions at Arques and Ophove.
2.      Delaying Action – Germans attempt to delay build up of American attack.
3.      Attack and Defend – Capture bridges over canal.
4.      Attack on an Objective/ Flank Attack – American attack on la Payellette ridge.
The first 3 scenarios will be played on a 1v1 basis, but the final scenario will involve all remaining troops as a multi-player game using the Big CoC rules.
German Players   Kevin McCusker, 1st Platoon and Coy CO
                                  John Muir, 2nd Platoon
                                  Ken West, 3rd Platoon
American Players - Ian Howlett, 1st Platoon and US CO
                                  David Muir, 2nd Platoon
                                  Alex Stoddart, 3rd Platoon.
Timing – Campaign will start in May and scenario 1 should be completed that month. Aim will be to play at least one scenario each month thereafter.
Players are asked to report on the outcome of each game and the current state of their platoon to their CO and the Adjutant (John Ewing) after each game.
Wounded men will not return to their platoon unless results are submitted on time!!

The Campaign Area

Raiders 565 AD

March 565AD.  

The Kingdom of Alt Clut is beset on all sides, from Saxons, Scotti and Picts.   This is an eight player campaign, with two much set upon British Kingdoms, surrounded by a host of uncivilised types. The players are shown in the map below.

More details of my British Kingdom to follow.

April AD565


Another month in soggy Alt Clut and another bunch of raids. This month my kingdom was raided twice!
The Saxons of Northern Rheged were back, looking for more loot after last month’s easy time of it, and also the Scotti of Cenel N'Gabrain had crossed the country to steal some of our fine livestock.
My Lord decided to ride out against the Scotti, using his household cavalry while sending one of his subordinates to go and deal with the Saxons. 
Once again the British were slightly late in giving chase, meaning that they ended up chasing after rather than intercepting the raiders.  Ian managed a maximum three moves with his escaping forces, while I ended up deploying behind them, to the left. It was going to be another evening of running after the invaders. Luckily I brought two units of cavalry to give chase with.

After them!


There was a turn of moving and getting into position before I had the opportunity to launch my Lord and cavalry into a glorious charge. The Scotti leader and one unit of cavalry were just within charge range, with only a measly unit of skirmishers standing in my way.  I needed a charge distance of 15” to make contact, and played a Carpe Deum card along with a handful of other useful cards (Artorious and one other I have forgotten). I managed to get a 15” exactly but alas the skirmishers managed to inflict one point of shock before they were dispersed, bringing my elite cavalry and accompanying lord up short by 1”.   Ian wasted no time and as soon as his cavalry had the chance they charged home against my cavalry, and a messy fight ensued. After a couple of rounds basically all the cavalry in the game were neutralised, with my Lord taking a wound and the Lords champion sacrificing himself to save his Lord. 

1 inch!

1 bloody inch!
All the while this was going on Ian was herding my cattle and sheep further towards his table edge and away to the Scotti lands.  I managed to get my troops on to the board but with my cavalry neutralised there was no much chance of me catching them with my Levy.  The levy really needed to be in shieldwall to stand a chance against the raiders, and if in shieldwall they would only move 1D6 inches a turn, and without shieldwall they would be cut to ribbons.  My only chance of stopping the raid now was to break the Scotti morale, and despite my best efforts Ian wisely refused to give battle and happily ran off with my livestock.
Brist look on from the hill as their cattle disapear into the distance.

So another successful raid against my kingdom in two months, with another still to be fought. Another player who cannot fight this month due to casualties is going to attempt to chase of the Saxons on my behalf, and I sincerely hope he manages it as if they succeed the Saxons will be back in May looking to steal some land.
Another game of Dux B and I struggled with this to be honest. The activation is so random it is very difficult to plan much of anything, as you have no idea when in the turn you are going to activate.   In this game my cavalry all activated very early in the turn, which is not ideal as you like to have the opportunity move some units in support or limit the amount of troops that your troops have yet to activate.  It is a learning curve and the result of this game basically came down to a distance of 1” as if the Brithish Shock Cavalry had managed to charge home it would have made a big mess of the Scotti force.  Not to be though and I wait to see the result of the Saxon raid with baited breath.  Random deployment is a pain as well as my last four games of Dux B have all basically someone chasing the other down the board. AT least of the Saxons get a straight up battle I will get a decent scrap out of it!